Category Archives: CUSTOM PATCHES

Best quality embroidered badges, monograms, and customized iron-on patches for clothing and accessories.


promotional custom patch strategies

5 Ways to Use Custom Patches as Promotional Giveaways

Custom patches are a dynamic tool for promotional giveaways, serving multiple functions across various events. First, they can be included in corporate event swag bags, enhancing guest engagement and reinforcing brand identity with high-quality, themed patches. Next, companies can utilize patches as part of employee recognition awards, visibly celebrating achievements and bolstering morale. Additionally, customized merchandise bundles can include patches to promote team spirit and brand loyalty. For direct engagement, patches make effective trade show handouts, providing a unique and memorable take-away for attendees. Finally, at community events, patches serve as cherished prizes that can boost participation and support causes. Each of these uses guarantees not only visibility but also a lasting connection with the brand, suggesting further exploration for those interested in the potential of custom patches.

Corporate Event Swag Bags

Within the domain of corporate events, swag bags serve as a vital tool for enhancing guest engagement and leaving a lasting brand impression. These carefully curated gift bags not only reward attendees but also strategically amplify a company’s brand identity. By including items that resonate with the event’s theme and the company’s values, organizations can create a cohesive and memorable event branding experience.

Swag bags are more than mere collections of promotional items; they are a tangible reflection of a company’s image and market positioning. The inclusion of high-quality, relevant items is essential. These could range from custom patches bearing the company logo to other branded merchandise that attendees find useful or unique. The selection of these items should be deliberate, aiming to both delight recipients and embed the brand into their everyday lives.

Moreover, the presentation of swag bags contributes considerably to their impact. Attractive packaging that aligns with the corporate aesthetic can enhance the perceived value and excitement around these giveaways. Thoughtfully designed swag bags not only foster positive associations with the brand but also encourage ongoing engagement, turning event attendees into brand ambassadors long after the event concludes.

Employee Recognition Awards

Recognizing employees for their hard work and dedication is a cornerstone of strong corporate culture. Incorporating custom patches as part of employee recognition awards not only celebrates achievements but also boosts morale and strengthens employee engagement strategies. These patches can serve as a tangible representation of an employee’s commitment and success, making them feel valued and appreciated within the company.

When designing these patches, it’s vital to seek patch design inspiration that resonates with your company’s values and the specific achievements being recognized. Whether it’s for outstanding customer service, innovation, or leadership, the design should clearly reflect the reason for the award. This specificity guarantees that the recipient and their peers understand the significance of the honor, further motivating them to aim for excellence.

Moreover, these custom patches can be incorporated into everyday work attire or special event uniforms, making them a constant reminder of the individual’s contributions and achievements. This visibility not only celebrates the individual but also promotes a culture of recognition and appreciation across the organization, reinforcing the importance of every team member’s efforts towards the company’s goals.

Customized Merchandise Bundles

Building on the concept of personalized corporate gifts, customized merchandise bundles offer a versatile and impactful way to promote brand identity and foster team spirit. Integrating custom patches into merchandise bundles not only enhances brand awareness but also allows for unique branding opportunities that resonate with both employees and customers.

Here are three compelling ways to leverage these bundles:

  1. Event-Specific Kits: Tailor bundles for company events like retreats or conferences, incorporating patches that commemorate the occasion alongside other themed items. This not only boosts the event’s uniqueness but also serves as a lasting reminder of the experience.
  2. Welcome Packs for New Hires: Create a welcoming atmosphere for new employees with a bundle that includes a custom-patched backpack, apparel, and other useful branded items. This approach helps new staff feel integrated into the company culture from day one.
  3. Customer Loyalty Rewards: Offer customized merchandise bundles as part of a loyalty program. Customers collecting patches from different products or events can lead to increased engagement and repeat business.

Such strategies not only emphasize the brand’s commitment to quality and individuality but also strengthen the emotional connection with the brand through personalized touchpoints.

Trade Show Handouts

Trade shows are a prime opportunity for businesses to expand their reach and engage directly with potential customers. At such events, the strategic use of custom patches as handouts can greatly enhance branding strategies. These patches, when well-designed, not only capture attention but also serve as a lasting reminder of the brand. They are tangible, unique, and can be affixed to everyday items, making them a walking advertisement.

Incorporating current trade show trends into the design of these patches, such as eco-friendly materials or interactive elements, can further amplify a company’s visibility and appeal. Businesses should consider how these trends align with their overall marketing objectives and target audience preferences. Effective branding through these patches involves more than just the company logo; it should also integrate elements that resonate on a personal level with event attendees.

Custom patches are cost-effective yet potent tools in a company’s promotional arsenal. By employing a thoughtful mix of aesthetic appeal and practical utility, businesses can guarantee these handouts leave a memorable impact. Additionally, they encourage conversations around the brand, potentially leading to meaningful engagements and future business opportunities.

Community Event Prizes

Custom patches also serve as excellent prizes at community events, often sparking interest and participation among attendees. These unique items can greatly enhance the appeal of local charity fundraisers or youth programs, encouraging greater community involvement and support. By integrating custom patches as rewards, organizers not only create a memorable experience but also promote their cause effectively.

Here are three strategic uses of custom patches in community events:

  1. Reward Volunteers: Acknowledge the hard work of volunteers in organizing and running community events. Custom patches can serve as a token of appreciation, boosting morale and encouraging continued participation.
  2. Fundraising Incentives: Use custom patches as incentives for donors at charity events. Unique designs representing the cause can motivate higher donations, directly benefiting programs such as shelters or educational initiatives for underprivileged youth.
  3. Youth Engagement: At events aimed at younger audiences, custom patches can be used as achievement badges within various activities. These patches reward participation and can help instill a sense of pride and accomplishment, promoting positive behavior and continued involvement in beneficial community programs.

Choosing the Right Embroidery Style for Name Tag Patches

Selecting the right embroidery style for name tag patches is essential for ensuring that the tags are both visible and durable. For clear legibility, a satin stitch is recommended for its smooth, lustrous finish on bold letters, while polyester threads offer superior color retention, maintaining the vibrancy of the tag despite frequent handling or washing. Appropriate fabric selection, such as durable synthetics that support robust stitching, greatly affects the longevity and professional appearance of the name tag. Additionally, consider the environmental factors that could degrade the fabric over time. Combining these elements thoughtfully will greatly ease the style and functionality of customizing name tag patches, setting the stage for further exploration into specific styles and techniques.

Understanding Embroidery Techniques

Embroidering name tags involves mastering various techniques that guarantee durability and visual appeal. The satin stitch, known for its smooth, lustrous surface, is ideal for creating bold, solid letters that are easily readable. Conversely, the chain stitch offers a more textured finish, providing a handcrafted look that adds character to the name tag. Appliqué techniques involve layering pieces of fabric onto the base material and then securing them with tight stitching, ensuring the patch withstands wear and tear.

Choosing the right thread types is critical. Polyester threads are praised for their colorfastness and resistance to fading, making them suitable for items that undergo frequent laundering. Rayon, although less durable, provides a brilliant sheen that enhances the aesthetic appeal of the name tag.

Modern embroidery machines, paired with advanced design software, streamline the creation process. The digitizing process converts your name tag design into a format that machines can read, ensuring precision in stitching. Additionally, selecting an appropriate patch backing, such as iron-on or sew-on options, can greatly affect the patch’s longevity and ease of application. Each element, from thread choice to backing type, plays a pivotal role in crafting a durable and visually appealing name tag.

Selecting the Right Fabric

When selecting fabric for iron on embroidery name tags, it is essential to take into account both the durability of the material and its ability to retain color. Fabrics that are prone to wear and tear or fade quickly can diminish the professional appearance of a name tag over time. Choosing a high-quality fabric guarantees that the embroidery remains vibrant and intact, even with frequent use.

Fabric Durability Considerations

Selecting the appropriate fabric is essential for guaranteeing the longevity and appearance of embroidered name tags. When choosing a fabric, it is imperative to take into account how it will stand up to fabric wear, accommodate stitch longevity, and maintain patch flexibility. The quality of the thread and the compatibility of materials used are critical for guaranteeing that the name tag remains intact and functional over time. Additionally, factors like environmental exposure and usage frequency can greatly affect the durability of the fabric. Choosing a fabric that balances patch weight with wear resistance will also contribute to the overall effectiveness and lifespan of the name tag.

Key considerations include:

  • Fabric Wear Resistance: Opt for materials that can withstand frequent handling and washing.
  • Stitch Longevity: Confirm the fabric supports robust stitching that doesn’t easily unravel.
  • Patch Flexibility: Select fabrics that maintain flexibility without compromising the patch’s structure.
  • Thread Quality and Material Compatibility: Use high-quality threads that are compatible with the chosen fabric to avoid issues like puckering.
  • Environmental Exposure and Usage Frequency: Take into account how often and under what conditions the name tag will be worn to select a fabric that can handle these factors.

Color Retention Properties

A fabric’s ability to maintain its color greatly impacts the visual integrity of embroidered name tags. When selecting a fabric, it’s essential to take into account how well it can hold up against fading and discoloration over time. This is especially important for name tags which are often exposed to varying conditions that can hasten the degradation of color vibrancy. To guarantee long-lasting color, opting for materials treated with colorfast dyeing techniques is advisable.

Different fabrics react differently to environmental challenges; for example, synthetic fibers generally offer better color retention than natural fibers. Additionally, the choice of thread types also plays a significant role. Polyester threads are renowned for their ability to resist fading and maintain color integrity under harsh conditions, whereas some natural fiber threads may not fare as well.

Fabric Type Color Retention Rating
Polyester Excellent
Cotton Moderate
Nylon Very Good
Rayon Fair
Silk Poor

Choosing the right combination of fabric and thread types will guarantee that the name tags not only look professional at the outset but also remain vibrant and legible for the long term. Remember, a well-chosen fabric enhances the overall durability and aesthetic appeal of your embroidered name tags.

Choosing Embroidery Fonts

While choosing an embroidery font for name tags, it is essential to take into account both legibility and style. The font selected can profoundly impact the clarity and aesthetic appeal of the name tag, essential in settings where identification is critical. Modern typography trends offer a range of styles from classic to contemporary, which can be tailored to match the branding or tone of the event or organization. However, legibility factors remain paramount; a beautifully designed font that is difficult to read defeats the purpose of a name tag.

When selecting an embroidery font, consider the following:

  • Font Size: Larger fonts are generally easier to read from a distance.
  • Font Style: Simple sans-serif fonts tend to offer better readability.
  • Stitch Density: Denser stitching can make letters appear more defined.
  • Letter Spacing: Adequate spacing between letters improves legibility.
  • Capitalization: Using all capital letters can increase the ease of reading the text.

Choosing the right embroidery font involves balancing aesthetic desires with functional needs, ensuring that the name tag is both attractive and practical.

Check out 5 best fonts for designing custom patches.

Color Combinations and Contrast

After considering the right embroidery font, the next step in creating effective name tags involves selecting appropriate color combinations and guaranteeing sufficient contrast. The interplay of colors not only captures attention but also communicates subtle messages through color psychology, influencing perceptions and behaviors. For instance, blue conveys trust and stability, making it a fantastic choice for corporate environments, while vibrant hues such as red or orange may denote energy and are fitting for more dynamic settings.

When selecting colors, consider seasonal trends that might reflect the current mood and style preferences. For example, soft pastels may be prevalent during spring, while rich, warm colors could be more suitable for autumn. The chosen colors must stand out against the fabric of the uniforms or background materials to guarantee visibility and legibility.

Furthermore, achieving sufficient contrast is essential for readability. Contrasting colors create a visual separation that helps the text pop from its background. A common effective combination is black text on a white background or vice versa. However, avoid overly harsh contrasts that strain the eyes or combinations like red and green, which might cause issues for those with color vision deficiencies. Through thoughtful color selection and contrast, embroidery for name tags can be both functional and aesthetically pleasing.

Placement and Sizing Strategies

Most name tags are positioned on the upper chest area to assure they are easily visible and readable. When considering the placement and sizing of embroidery on name tag patches, it’s essential to adhere to specific guidelines to maintain a professional appearance. Proper placement and sizing not only guarantee uniformity but also boost the legibility and recognition of the name tags in various settings.

Here are some key placement options and sizing guidelines:

  • Uniformity Across Garments: Assure consistent placement on the same spot for each garment type to maintain a unified look.
  • Visibility and Legibility: Position the name tag at eye level; this typically means the upper chest area, not obscured by lapels or folds.
  • Standard Sizing Rules: Generally, name tags should be between 3 to 4 inches wide and 1 to 2 inches high.
  • Proportional Sizing: Size the name tag in proportion to the garment size and the wearer’s body; larger garments may require slightly larger tags.
  • Adherence to Specific Codes: Some organizations have specific codes for name tag placement and size, which must be strictly followed.

Maintenance and Care Tips

Ensuring the longevity and pristine appearance of embroidered name tags requires proper maintenance. Cleaning techniques vary depending on the materials used, but gentle hand washing is generally recommended to prevent damage to the embroidery. When storing embroidered items, it is essential to keep them flat and in a dry environment to avoid creases and moisture accumulation, which can lead to fabric degradation.

Cleaning Embroidered Patches

Proper maintenance of embroidered patches is essential to preserve their appearance and durability. Over time, patches can accumulate dirt and may even sustain stains, diminishing their aesthetic value and structural integrity. Regular and careful cleaning can greatly prolong the life and beauty of these items.

Here are some key maintenance tips for patch cleaning and stain removal:

  • Spot Clean Gently: Use a soft, damp cloth to gently dab at any stains or soiled areas. Avoid harsh scrubbing, which can damage the threads and fabric.
  • Mild Detergent: Opt for a mild detergent or a specialized fabric cleaner. Harsh chemicals can fade or even disintegrate the embroidery.
  • Cold Water Rinse: Always rinse the patches in cold water after cleaning. Hot water can cause the colors to run or the patch to shrink.
  • Blot Dry: After rinsing, carefully blot the patch with a dry towel to remove excess moisture. Avoid wringing or twisting.
  • Air Dry: Let the patch air dry completely before reattaching or storing it. Avoid using heat dryers as they can warp or shrink the fabric.

Storage Best Practices

Following thorough cleaning, the correct storage of embroidered patches is essential to maintain their quality and longevity. When storing patches, it’s important to keep them in a cool, dry place to prevent any moisture from causing mold or mildew. A common mistake is leaving patches in areas prone to extreme temperature changes, which can degrade the materials and fade the colors over time.

For ideal organizing of supplies, consider using acid-free tissue paper to wrap each patch. This method not only prevents the threads from catching on each other but also shields the embroidery from dust and light exposure, both of which can be detrimental over long periods. Additionally, flat storage in a drawer or a storage box can help maintain the patch’s shape and appearance. Avoid folding or stacking them tightly as this can cause creases and damage the intricate stitching.

embroidered patches name tags

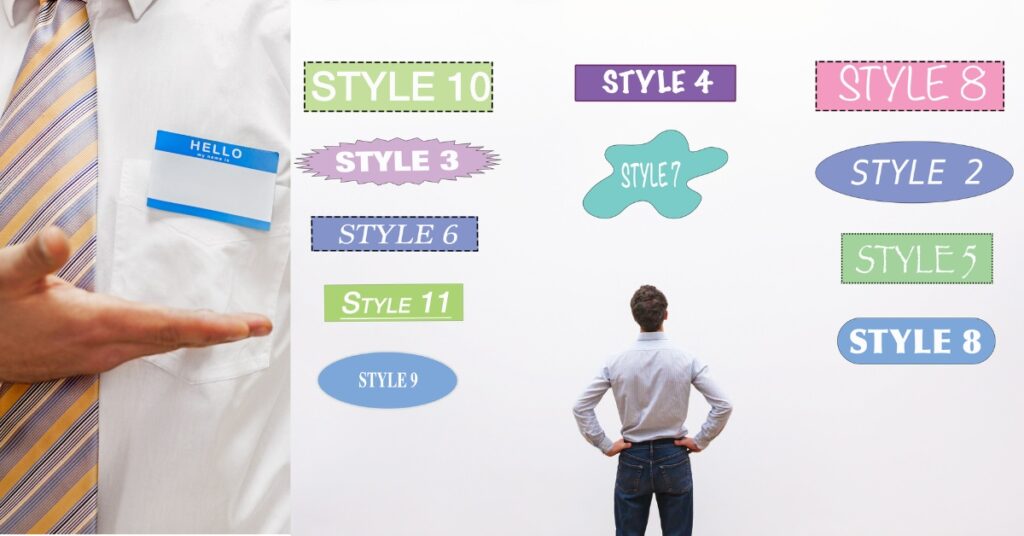
How to Customize Name Tags With Embroidered Patches

Customizing name tags with embroidered patches begins with selecting the appropriate fabric and thread, focusing on durability, color retention, and comfort, especially for frequent wear scenarios. Polyester or cotton fabrics, partnered with polyester threads for strength or rayon for sheen, are ideal choices. Design your tag by picking a legible font and a shape that complements its intended use, whether a traditional rectangle or a more personalized shape like stars or shields. Attachment options vary; sewing offers longevity, while heat sealing provides a quicker solution. Proper care extends the lifespan of these tags, involving gentle cleaning and avoiding heavy wash cycles. Exploring these aspects further will reveal deeper insights into crafting a perfect name tag.

Choosing the Right Fabric

Selecting an appropriate fabric is a fundamental step in creating embroidered name tags that are both aesthetically pleasing and durable. The choice of fabric greatly impacts not only the look but also the longevity of the name tags. When considering fabric types, one must evaluate a variety of texture options and durability factors. Fabrics such as cotton, polyester, and blends offer distinct advantages depending on usage requirements. Cotton is favored for its softness and breathability, whereas polyester is prized for its strength and color retention.

Color choices are vast, but it’s vital to select hues that do not fade easily, especially if the name tags will be subjected to frequent washing. Weight considerations are equally important; a heavier fabric might lend more sturdiness but could also affect the drape and comfort if used on garments.

Maintenance tips include choosing a fabric that supports easy care routines, like machine washable materials, which are essential for items used daily. When sourcing fabrics, consider reputable suppliers to guarantee quality. A thorough cost analysis should also be conducted to balance budget with needs, as higher quality often comes with a higher price tag but less frequent replacements.

Selecting Quality Embroidery Thread

Selecting the right embroidery thread is vital for ensuring both the aesthetic appeal and longevity of your embroidered name tags. Considerations must include the type of material—from polyester to rayon—each offering distinct benefits in durability and sheen. Additionally, evaluating color fastness to prevent fading and choosing the appropriate thread thickness are essential steps to maintain the quality and appearance of the embroidery over time.

Thread Material Options

Choosing the right embroidery thread is crucial for achieving high-quality, durable name tags. When selecting thread, it’s essential to evaluate both thread durability options and thread texture varieties. Durability is paramount as name tags often undergo frequent wear and exposure. Polyester threads are renowned for their strength and resistance to fading and shrinkage, making them ideal for items that require frequent laundering or outdoor use. Rayon, although less durable, offers a higher sheen and smoother texture, which can enhance the aesthetic quality of the name tag.

Thread texture also plays a significant role in the final appearance and attractive embroidery style for name tag. Cotton threads provide a soft, matte finish that is comfortable against the skin, suitable for clothing name tags. Silk threads, offering a luxurious sheen and smoothness, elevate the elegance of high-end name tags but may require more delicate handling.

Color Fastness Considerations

In the domain of embroidered name tags, the color fastness of the embroidery thread is a vital factor that directly influences the longevity and visual appeal of the final product. Selecting threads with high-quality pigments and proven color retention capabilities is important. This guarantees that the colors remain vibrant even after multiple washes and exposure to sunlight, maintaining the tag’s professional appearance.

Fabric dyeing techniques and the quality of the dye used play a vital role in the fading resistance of embroidery threads. Threads treated with superior fabric treatments ensure enhanced wash durability and resistance to sunlight. This treatment helps in preserving the thread’s brightness and prevents the colors from becoming dull or washed out over time.

Embroidery longevity is also affected by how well the thread’s color matches the intended design, especially after color testing under various conditions. Frequent testing for color retention can provide a reliable indication of how the embroidery will endure over time. It’s important to choose threads that have undergone rigorous color testing to guarantee they meet the standards of both fabric dyeing and color matching. This attention to detail in selecting the right thread will contribute greatly to the overall success and durability of embroidered name tags.

Thread Thickness Choices

After considering the color fastness of embroidery threads, another important aspect to focus on is the thickness of the thread, which plays a significant role in the quality and appearance of embroidered name tags. Thread thickness not only influences the final look but also impacts thread durability factors and thread texture differences.

Choosing the right thread thickness is vital for guaranteeing that the embroidery does not fray or break, contributing to the longevity and durability of the name tag. Thicker threads are generally more robust, providing a bold and raised texture, which enhances the tactile quality of the embroidery. Conversely, thinner threads allow for finer detail and a smoother appearance, which can be essential for intricate designs or smaller text.

Here’s a quick guide to help you understand the common options and their applications:

Thread Thickness Durability Best for
Fine (40 wt) Moderate Detailed designs
Medium (30 wt) High General text and patterns
Coarse (20 wt) Very High Bold, visible text

Selecting the appropriate thread thickness based on the specific needs of your embroidered name tags guarantees a balance between aesthetic appeal and functional durability.

Designing Your Name Tag

As you begin designing your name tag, it’s essential to carefully consider the font styles and patch shapes that will best represent your identity and role. Choosing the right font style can greatly impact the legibility and aesthetic appeal of your name tag, while the shape of the patch should align with the overall design and purpose. These elements together create a cohesive and functional name tag that effectively communicates your personal or professional brand.

Choose Font Styles

Selecting the right font style is an essential step in designing your embroidered name tag, as it greatly influences the tag’s readability and aesthetic appeal. When choosing a font, consider both readability factors and font pairing. A clear, legible font guarantees that the name on the tag can be easily read from a distance. Sans-serif fonts like Arial or Helvetica are often recommended for their clean lines and excellent readability.

Font pairing involves selecting complementary fonts if you’re incorporating more than just a name, such as a title or organization. This might include pairing a bold sans-serif font for the name with a more subdued serif font for additional text, which can create a visually appealing hierarchy. Be cautious with overly decorative fonts, as these can sometimes reduce readability, especially when scaled down to fit on a name tag.

Additionally, consider the emotional impact of font choices. Fonts convey personality and tone; for instance, a script font might suggest elegance, while a blocky, bold font could convey strength and stability. Each choice should align with the image and ethos of the person or organization represented by the name tag.

Select Patch Shapes

Choosing the right patch shape is a crucial decision in the design of your embroidered name tag. The shape serves as the foundation of your tag, framing your name and any additional design elements. It’s not just a backdrop; it’s a key component that can enhance or undermine the aesthetic and functional goals of the tag.

Various patch shapes offer different visual impacts and space allocations. Traditional shapes like rectangles and ovals are popular for their classic look and ample space for both text and creative designs. These shapes are straightforward and guarantee that the focus remains on the embroidered content.

However, opting for more unique or unconventional shapes can set your name tag apart. Consider shapes like shields, stars, or even custom silhouettes that relate to a specific theme or personal interest. These creative designs can make a name tag more noticeable and reflective of individuality.

When selecting a patch shape, consider the practical aspects such as the size of the garment on which the patch will be attached and the nature of the event where it will be worn. A well-chosen shape not only complements your design but also guarantees that the name tag fulfills its primary function—clear and effective identification.

Understanding Patch Sizes

The size of an embroidered patch plays a fundamental role in both its visibility and the detail it can effectively display. When customizing name tags, selecting the right patch dimensions is essential to guarantee that the patch is neither too imposing nor too subtle. Typically, patch sizes range from one inch, suitable for simple logos or initials, up to several inches for more elaborate designs that need more detail.

Patch placement also greatly influences the choice of size. For example, a patch intended for the chest area of a shirt can be larger than one meant for a sleeve or collar, where space is more limited. It’s imperative to take into account the garment or item the patch will adorn. A larger patch on a small item can overwhelm the design, while a too-small patch might get lost on a larger canvas.

In essence, choosing the right size for an embroidered patch involves balancing the aesthetic appeal with practical considerations like the visual impact and the intended placement. This careful evaluation guarantees that the patch complements the item it adorns without overpowering it, maintaining both style and functionality.

Adding Unique Personal Touches

When customizing name tags with embroidered patches, selecting a distinctive font can greatly enhance their visibility and aesthetic appeal. Additionally, choosing the right color combinations can not only reflect personal or organizational branding but also guarantee that the name tag stands out effectively. Incorporating symbolic icons, such as emblems or logos, adds a layer of personal or professional identity, making each patch unique and meaningful.

Choose Distinctive Fonts

Selecting distinctive fonts for embroidered name tags adds a unique personal touch that distinguishes one’s identity in a memorable way. Employing creative font ideas and exploring font pairing techniques can elevate the aesthetic appeal and functional clarity of name tags. When choosing fonts, consider the readability and the emotion you wish to convey. A well-chosen font not only enhances visibility but also reflects the wearer’s personality or the ethos of a group or event.

To grasp the impact of different fonts, consider the following table showcasing various styles and their associated emotions:

Font Style Emotion Conveyed Ideal Use
Script Elegant, Formal Weddings, Galas
Serif Trustworthy, Traditional Academic Events, Conferences
Sans-serif Modern, Approachable Casual Events, Tech Conferences
Handwritten Personal, Intimate Small Gatherings, Boutiques
Gothic Bold, Mysterious Themed Events, Creative Spaces

Each font type brings its unique flavor, transforming a simple name tag into a statement piece. It is essential to match the font style with the event’s nature and the identity you wish to project. Thoughtful font pairing can greatly impact the tag’s readability and aesthetic harmony, making it vital to choose wisely to achieve the desired effect.

Select Color Combinations

Choosing the right color combinations for embroidered name tags can greatly enhance their visual impact and personal significance. Utilizing color psychology can evoke specific feelings and associations—red can signify energy and passion, while blue might convey trust and calmness. It’s essential to select hues that align with the message or identity you wish to project.

Seasonal palettes can be particularly effective for events or organizations that want to emphasize timeliness and relevance. For instance, incorporating warm oranges and browns can resonate with autumn themes, whereas soft pastels are perfect for spring events. Contrasting colors, when used wisely, create a vibrant and eye-catching effect that guarantees the name tags stand out. However, it is important to make sure that there is enough contrast to maintain legibility.

Monochromatic schemes offer a subtle and sophisticated look, promoting a unified aesthetic. These can be especially useful in professional or formal settings where simplicity and elegance are paramount. Brand alignment is also critical; choose colors that reflect the company’s logo or corporate identity to reinforce brand recognition.

Finally, consider occasion themes to further customize the experience. Selecting colors that complement the event’s motif can make the name tags not only memorable but also deeply connected to the event’s atmosphere.

Incorporate Symbolic Icons

Incorporating symbolic icons into embroidered name tags introduces a layer of personalization that enhances the connection between the wearer and the tag. By using imagery that carries significant symbolic meanings, you create a more distinct and meaningful design. These icons can range from cultural symbols, such as national flags or traditional motifs, to personal emblems representing a hobby, profession, or spiritual belief.

Understanding the icon significance is vital when selecting symbols for embroidery. Each image carries weight and conveys messages, which can deeply resonate with the individual or communicate certain values to observers. For instance, a caduceus symbol on a medical professional’s name tag not only identifies their role but also underscores their commitment to health and healing. Similarly, incorporating an oak leaf might symbolize strength and endurance, subtly conveying personal traits or aspirations.

When customizing name tags, consider the broader implications and cultural sensitivities associated with symbolic icons. Misinterpretation or misuse of symbols can lead to misunderstandings or offense. As a result, it’s important to research and choose icons that accurately and respectfully reflect the wearer’s identity and values, ensuring that the name tag serves as a true extension of oneself.

Exploring Border and Edge Styles

As we explore the variety of border and edge styles available for embroidered name tags, it is essential to understand how each type can enhance the appearance and durability of the final product. Border styles and edge finishes are pivotal in defining both the look and lifespan of a patch. Decorative stitching along the borders can serve not only a functional purpose, by preventing fraying, but also an aesthetic one, adding a unique flair to each piece.

Contrasting trims can be used to frame the name tags distinctively, making the text stand out against varying fabric colors. Patch outlines, whether bold or subtle, give a clean finish and can be tailored to complement the logo or emblem incorporated in the design. Fabric borders offer a traditional look, while embroidered accents introduce texture and depth. Unique edges, such as scalloped or jagged styles, can reflect the personality or brand identity more vividly, offering a creative twist to standard designs.

Choosing the right edge and border type is not merely a cosmetic decision but a practical one, ensuring the name tag remains intact and visible throughout its use.

Techniques for Attaching Patches

Having explored the various border and edge styles for embroidered name tags, we now turn our attention to the methods used for attaching these patches to garments. Selecting the right patch application method is vital for both aesthetics and durability.

  1. Sewing Techniques: This traditional method offers strong attachment and longevity. It’s ideal for heavy-use items but requires sewing skills or professional services. Patch placement tips include measuring the exact location before starting to guarantee symmetry and alignment. Fabric compatibility checks are essential to prevent damage to delicate fabrics.
  2. Heat Transfer Techniques: Using an iron or a heat press, heat transfer techniques allow adhesive options to bond the patch securely to the fabric. It’s faster than sewing and provides good durability, though not as strong as stitching. Verify the fabric can withstand the heat to avoid scorching or melting.
  3. Adhesive Options: For temporary or removable patches, adhesives offer an easy solution. They are perfect for custom patch designs that might change frequently. However, check patch durability factors, as adhesives can weaken over time and may not survive heavy wash cycles.

Each technique has its place depending on the use case and fabric type, so consider your needs carefully to choose the appropriate method.

Caring for Embroidered Name Tags

Proper maintenance of embroidered name tags is vital to guarantee their longevity and appearance. Regular cleaning and careful storage are paramount to prevent damage and ascertain that these personalized tags continue to enhance professional attire or uniforms effectively.

When it comes to cleaning techniques, always refer to the specific care instructions provided with your embroidered patches. Generally, gentle hand washing with mild soap and cold water is recommended to avoid fraying or color bleeding. Avoid harsh chemicals and scrubbing vigorously, as this can damage the delicate embroidery. Allow the name tags to air dry completely before reattaching them to clothing or storing them away.

Storage tips are equally important for maintaining the quality of embroidered name tags. Store them flat in a cool, dry place to prevent the fabric from becoming misshapen or mildewed. If stacking multiple name tags, place a piece of clean, white tissue paper between each layer to avoid color transfer and friction which can wear down the threads over time. Properly caring for your embroidered name tags not only extends their life but also guarantees they remain a pristine and professional part of your or your team’s presentation.

Reviewing Cost and Budget Considerations

When planning to customize name tags with embroidered patches, it’s vital to take into account the associated costs and set a realistic budget. Embroidery pricing can vary widely depending on several factors including design complexity and order quantity. It’s important to perform a thorough cost analysis to guarantee that the project stays within financial limits without compromising on quality.

To effectively manage your expenses, consider the following:

  1. Bulk Purchasing: Ordering patches in larger quantities can considerably reduce the cost per unit. This is ideal for organizations needing multiple name tags, as bulk deals often come with discounts.
  2. Price Comparison: Before committing to a specific supplier, it’s imperative to compare prices from different sources. This not only helps in finding the most cost-effective option but also aids in understanding the market rate for such customizations.
  3. Budget Planning: Allocate a specific portion of your budget for different stages of production. This includes initial design fees, material costs, and any potential adjustments. Patch affordability should be balanced with the need for durable, high-quality end products.

Sourcing Materials and Tools

After establishing a budget for custom embroidered name tags, the next step involves sourcing the necessary materials and tools for production. This phase is critical, as the quality of materials directly influences the final product’s appearance and durability. Begin by finding suppliers who specialize in embroidery supplies. Look for vendors that offer a wide range of fabrics, threads, and backing materials, ensuring they cater to both aesthetic preferences and functional requirements.

In comparing prices, don’t simply opt for the cheapest options. Evaluate the cost against the quality and longevity of the materials. Remember, lower prices might lead to poorer quality, which can affect the overall look and feel of your name tags. It’s advisable to request samples from potential suppliers to assess the materials firsthand before making a bulk purchase.

Also, consider the tools needed for embroidery, such as needles, hoops, and embroidery machines. These tools should be compatible with the materials chosen and suitable for the complexity of the designs intended. Research different brands and read reviews to understand their performance and reliability. Making informed decisions at this stage will save costs and prevent future issues in your production process.

enhancing nighttime visibility safety

Why Glow-in-the-Dark Custom Patches Are Essential for Nighttime Safety

Glow-in-the-dark custom patches are vital for nighttime safety due to their ability to enhance visibility in low-light conditions. These patches leverage photoluminescent materials, such as strontium aluminate, which absorb light and then emit a sustained glow, ensuring continuous visibility without dependence on external light sources. This feature is important for pedestrians, cyclists, and workers in poorly lit areas, as it greatly lowers the risk of accidents by making them more noticeable to motorists. By wearing glow-in-the-dark patches, individuals signal their presence effectively, thereby fostering safer environments during night hours. Such adaptations not only prevent potential hazards but also highlight the importance of visibility in maintaining nighttime safety. This is just the surface of how glow technology interplays with safety measures.

Importance of Visibility at Night

Enhancing visibility during nighttime is essential for safety and operational efficiency. As darkness falls, the risk of accidents and miscommunication increases exponentially. In settings where visibility is compromised, such as roadways, industrial environments, and outdoor activities, maintaining high levels of nighttime awareness is critical. This is where the use of reflective materials becomes invaluable.

These materials are designed to catch and bounce back artificial light, effectively creating a high-visibility profile against the dark backdrop. For individuals working in low-light conditions or maneuvering through areas with poor lighting, reflective materials can mean the difference between being seen and being overlooked. Such visibility is not just a matter of convenience but a crucial safety measure that protects lives.

Reflective elements incorporated into clothing, gear, and signage help outline the human form or highlight important objects, ensuring they are immediately noticeable. This practice greatly reduces the likelihood of accidents, as it allows for quick recognition and appropriate response actions. As a result, investing in technologies and solutions that enhance visibility is not merely advisable; it is imperative for ensuring safety during nighttime operations.

How Glow Patches Work

Illuminating the technology behind glow-in-the-dark patches reveals a fascinating use of photoluminescent materials. These patches contain phosphorescent materials, which are capable of storing light energy and slowly releasing it as a visible glow in the dark. The process begins when these materials are exposed to a light source. During this exposure, the phosphorescent substances absorb light photons, which excites the electrons within the material to a higher energy state.

Once the light source is removed, these excited electrons gradually return to their original, lower energy state. As they return to equilibrium, the excess energy is released in the form of light, which is what produces the glowing effect. This phenomenon of light absorption and slow release is what makes these patches an innovative solution for enhancing visibility without the need for continuous external light sources.

The materials used are typically either strontium aluminate or zinc sulfide, with strontium aluminate being favored for its longer and brighter glow. The practical application of this technology in safety gear, especially in low-light conditions, taps into the natural human attraction to light and enhances the ability to notice and recognize objects in the dark.

Safety Benefits for Pedestrians

Glow-in-the-dark custom patches offer significant safety benefits for pedestrians, particularly in low-light conditions. By enhancing visibility after dark, these patches serve as a vital accident prevention measure, making wearers more noticeable to drivers and cyclists alike. This increased visibility is especially essential in areas with poor street lighting, potentially reducing the likelihood of accidents involving pedestrians.

Enhanced Visibility After Dark

The safety benefits of glow-in-the-dark custom patches are particularly substantial for pedestrians during nighttime hours. These patches, infused with phosphorescent materials, provide a critical safety measure by enhancing the visibility of individuals in low-light conditions. Their efficacy stems largely from their use of reflective materials and strategic color contrast, which considerably amplify visibility to drivers and other pedestrians.

Here are four key reasons why these patches are indispensable:

  1. Increased Recognition Distance: Reflective materials on the patches can bounce back vehicle headlights, making pedestrians noticeable from greater distances. This extended visibility range gives drivers more reaction time.
  2. Visual Alertness: The bright and contrasting colors of the patches catch the attention of drivers more effectively than regular clothing, reducing the risk of accidents due to low visibility.
  3. Versatility in Application: These patches can be affixed to any piece of clothing, making them a flexible option for any pedestrian, whether they are walking, jogging, or cycling.
  4. Cost-effective Safety Solution: Glow-in-the-dark patches are a low-cost investment in personal safety, making them accessible to a wide audience, including school-aged children, without considerable financial burden.

Accident Prevention Measures

Implementing glow-in-the-dark custom patches as part of a thorough pedestrian safety strategy greatly reduces the likelihood of accidents after dark. These patches serve as essential visibility enhancements that alert drivers to the presence of pedestrians, which is especially crucial in areas with poor street lighting or during conditions such as fog and heavy rain.

The integration of such glow-in-the-dark elements into clothing and accessories aligns with broader road safety measures, creating a safer environment for everyone. When pedestrians wear these patches, they become more discernible at a distance, giving drivers ample time to react and adjust their driving accordingly. This proactive approach to safety can markedly mitigate the risks of night-time pedestrian accidents, which are often severe and sometimes fatal.

Moreover, educating communities about the importance of visibility and encouraging the widespread adoption of glow-in-the-dark patches can foster a culture of safety. Schools, local government units, and organizations can play pivotal roles by distributing these patches and incorporating them into public safety campaigns. By making these simple yet effective tools part of everyday life, communities can enhance safety for all, particularly after sunset.

Advantages for Cyclists

For cyclists, the incorporation of glow-in-the-dark custom patches provides significant safety advantages, particularly regarding enhanced visibility after dark. These patches serve as an important accident prevention measure by making cyclists more noticeable to motorists, thereby reducing the likelihood of collisions. Additionally, the increased visibility can bolster a cyclist’s confidence when riding at night, promoting a safer and more secure experience.

Enhanced Visibility After Dark

Often overlooked, the use of glow-in-the-dark custom patches greatly enhances visibility for cyclists after dark, offering a critical safety advantage. These patches, which utilize advanced glow technology, play an essential role in making cyclists more noticeable to drivers, pedestrians, and other cyclists, thereby reducing the risks associated with nighttime cycling.

The benefits of these glow-in-the-dark patches include:

  1. Increased Visibility: The bright emission of light from the patches makes cyclists visible from a greater distance, giving others more time to react.
  2. Long-Lasting Glow: Modern glow technology guarantees that these patches maintain their luminosity for hours after being charged by natural or artificial light, providing sustained safety throughout a ride.
  3. Variety in Patch Materials: Available in various materials, these patches can be attached to different parts of cycling gear or the bicycle itself, offering flexibility in how visibility is enhanced.
  4. Aesthetic Appeal: Besides the safety features, these patches come in various designs that add a stylish flair to safety gear, encouraging more cyclists to wear them regularly.

Accident Prevention Measures

As cyclists integrate glow-in-the-dark patches into their gear, they considerably decrease the likelihood of accidents by enhancing their visibility to other road users during nighttime or low-light conditions. These patches serve as a significant component in traffic safety, making the cyclist a clearly visible entity on the road, which is essential in preventing collisions and ensuring personal protection.

Visibility is often compromised during night rides, and standard reflective materials can only function when directly illuminated by headlights. However, glow-in-the-dark patches emit a steady luminosity, providing continuous visibility without the need for external light sources. This feature is particularly beneficial at intersections and in areas where street lighting is inadequate or absent.

Nighttime Riding Confidence

Cyclists’ confidence during nighttime rides greatly increases with the use of glow-in-the-dark patches. These patches not only enhance visibility but also greatly contribute to the safety and assurance of riders starting on nighttime adventures. When integrated into riding gear, these luminous accessories serve several essential functions.

Here are four key advantages:

  1. Improved Visibility: Glow-in-the-dark patches make cyclists more visible to drivers, reducing the risk of accidents. This visibility is important in areas with poor or no street lighting.
  2. Increased Awareness: Other road users are more likely to notice cyclists earlier, thanks to the bright patches. This early detection can be critical in preventing collisions.
  3. Enhanced Group Cohesion: In group rides, these patches help maintain the formation by allowing cyclists to see each other in low light conditions, fostering a safer communal riding experience.
  4. Personal Security: The psychological comfort of being seen adds an extra layer of security, encouraging cyclists to enjoy their rides without the constant worry about being invisible to others.

Essential for Emergency Teams

Equipped with glow-in-the-dark patches, emergency teams gain a vital advantage during nighttime operations or in low-visibility conditions. These patches not only enhance visibility but also bolster emergency identification and team cohesion, essential elements in the chaotic environments where these teams often operate. Visibility is paramount in guaranteeing that each team member can be quickly and accurately identified by both their colleagues and civilians in need of assistance. This reduces the risk of friendly fire incidents and guarantees that help is directed where it is most needed.

Furthermore, the cohesive appearance fostered by uniform patches instills a sense of unity and professionalism among team members. It also serves as a reassuring sign to civilians, who can easily recognize the presence of aid in the darkness. In emergency scenarios, where seconds count, the ability to promptly identify and coordinate with team members without hesitation or confusion can literally mean the difference between life and death.

Moreover, these patches are designed to be durable and maintain their luminosity under extreme conditions, guaranteeing that they remain effective throughout the operation. As emergency teams often face unpredictable environments, the reliability of their gear, including their identification patches, is non-negotiable.

Creative Uses in Safety Gear

Innovatively incorporating glow-in-the-dark patches into safety gear can greatly enhance visibility and safety across various professions and activities. These patches are not just functional; they can also be stylish fashion accessories. Creative designs on safety gear, such as on kids’ clothing or sports uniforms, make wearing them more appealing while guaranteeing safety during nighttime activities or in low-light environments.

For outdoor adventures and camping gear, these patches serve a dual purpose. They add a distinctive style and improve the wearer’s visibility, which is vital in preventing accidents in dark, crowded, or natural settings. Similarly, festival outfits equipped with glow-in-the-dark elements can transform safety into a fashion statement, merging practicality with enjoyment.

Promotional items with these patches can also enhance brand visibility effectively during evening events. By integrating glow-in-the-dark patches into various items such as caps, backpacks, and jackets, companies can make certain their logos are seen at all times, increasing brand recognition while contributing to the safety of event participants.

Thus, glow-in-the-dark patches are versatile tools in safety gear, combining essential visibility with creative, engaging designs that suit a wide range of uses and preferences.

diy iron on patch instructions

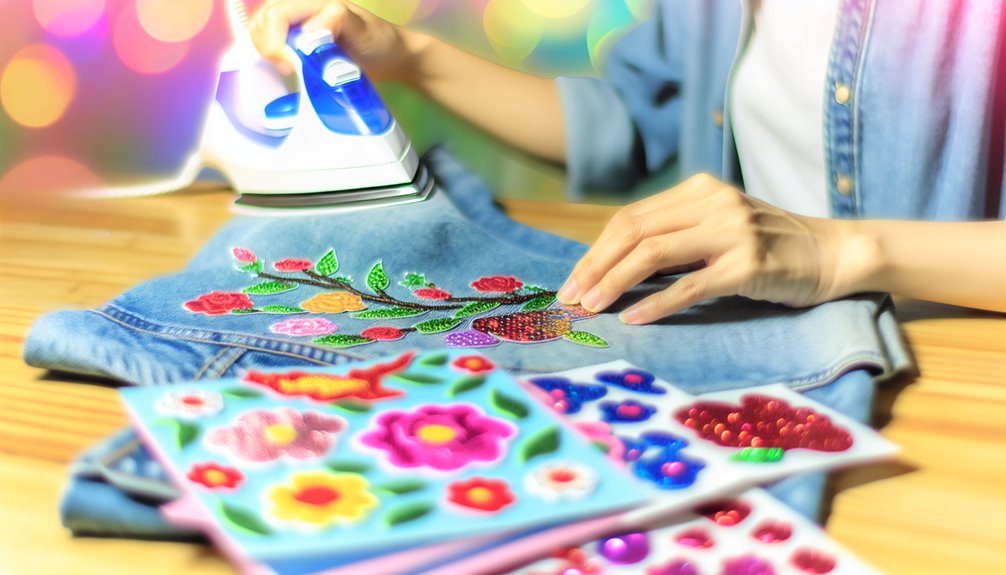
Step-by-Step Guide to Using Iron-On DIY Patch Kits

To effectively use an iron-on DIY patch kit, begin by selecting a patch that matches the material and color of your garment, guaranteeing compatibility for best results. Prepare your workspace by organizing necessary tools such as an iron, ironing board, and parchment paper, and make certain the fabric is clean and smooth. Position the patch accurately, securing it temporarily with heat-resistant tape if needed. Set your iron to the manufacturer-recommended temperature, and apply firm, steady pressure without moving the iron to properly adhere the patch. After 15-30 seconds, allow the patch to cool. Proper application prevents damage and extends the lifespan of the garment, offering further insights into maintenance techniques and best practices.

Selecting Your Patch

Selecting the right patch is an important first step in any DIY repair kit project. Understanding the variety of patch material types and staying updated with patch design trends are vital. The material chosen will heavily influence both the aesthetics and functionality of your patch. Common materials include denim, leather, and synthetic fabrics, each with distinct qualities. Denim patches offer durability and ease of sewing, making them ideal for casual wear repairs. Leather patches add a luxurious and sturdy touch but require specific tools for application.

In terms of design, the current trends lean towards vibrant, eclectic patterns as well as sustainable, eco-friendly materials. It’s important to reflect on the garment’s use and the match between the patch material and the clothing fabric. For instance, a heavy leather patch might not be suitable for a lightweight cotton t-shirt. Additionally, the trend of using recycled materials for patches not only supports sustainability but also adds a unique story to your DIY project.

When selecting a patch, think about the end-use of the garment, the compatibility of materials, and how the patch contributes to or enhances the piece’s overall style and integrity. Choose wisely to guarantee both longevity and style.

Gathering Necessary Materials

Before constructing your DIY patch kit, it’s vital to gather all necessary materials to guarantee a smooth and efficient process. Begin by assembling essential items such as fabric patches, adhesive, and sewing supplies, which are foundational for any repair or customization task. Additionally, preparing your workspace by making sure it is clean, well-lit, and organized can greatly enhance the quality of your work and prevent any potential mishaps.

Essential Patch Kit Items

Gathering the vital items for your DIY patch kit is the first step in ensuring effective and durable repairs. The kit should include a variety of patches, which can range from simple, color-matched fabric squares to elaborate designs that offer both functionality and style. Choosing patches that resonate with your personal style or the specific repair needs can serve as a great source of patch design inspiration.

Additionally, an iron is important for applying most iron-on patches, ensuring they adhere properly to your garments. A sturdy ironing board or a flat, heat-resistant surface also plays a significant role in this process. To maintain the quality and durability of your patches, it’s important to have parchment paper or a thin cloth to place between the iron and the patch. This prevents overheating and potential damage to both the fabric and the patch.

Other indispensable items include sharp scissors for trimming excess material and tweezers for precise placement and adjustment of small or delicate patches. Remember to gather these tools in advance to streamline your patching process. This preparation not only saves time but also enhances the outcome of your repair, embodying both creativity and care.

Preparing Your Workspace

To guarantee an efficient and effective patching session, preparing your workspace with the necessary materials is vital. Start by clearing any clutter from the area where you will work. A clean, flat surface is essential for laying out fabrics and applying patches without interference. Verify that the lighting is adequate, which will help in aligning the patches precisely and spotting any uneven edges or potential fabric snags.

Workspace organization plays a significant role in streamlining the patching process. Arrange all the tools and materials you need in a logical order within easy reach. This might include your iron, ironing board, the patches, any adhesive or fabric pens, and a pressing cloth to protect the fabric’s surface from direct heat. Tool accessibility not only speeds up the task but also reduces the risk of errors caused by unnecessary movement or adjustments during the application.

Additionally, consider the placement of your ironing board. It should be set at a comfortable height to avoid strain on your back or arms, enhancing both safety and comfort as you work. By organizing your workspace thoughtfully, you guarantee a smoother, more successful patch application.

Preparing the Fabric

As you commence on the process of preparing the fabric for your DIY patch kit, it is essential to confirm that the material is clean and free from any oils or dirt that could affect the adhesion of the patch. Proper fabric preparation is vital to guarantee the patch adheres well and lasts long.

Different types of fabrics in U.K require specific attention. For instance, cottons and linens can typically be machine washed and dried before application, while more delicate fabrics like silk or wool might need dry cleaning or gentle hand washing.

Here’s a quick guide on how to prepare various fabric types:

Fabric Type Cleaning Method Drying Method
Cotton Machine wash warm Tumble dry low
Linen Machine wash gentle Air dry
Silk Hand wash or dry clean only Lay flat to dry
Wool Dry clean or cool hand wash Lay flat to dry

Always confirm the fabric is completely dry and ironed if necessary before applying the patch. This smooths out any wrinkles and provides a clean, flat surface, enhancing the effectiveness of your DIY patch application.

Positioning the Patch

Once the fabric is prepared and ready, correctly positioning the patch becomes the next important step. Effective patch placement strategies guarantee that the patch both looks good and adheres properly. Visual alignment techniques are vital here to guarantee symmetry and aesthetic appeal.

Here are key steps to follow:

  1. Identify the Ideal Location: Depending on the purpose of the patch (decorative, to cover a tear, etc.), choose a spot where it will be most effective or visually appealing. Confirm the surface is flat and smooth.
  2. Use Measuring Tools: For precise placement, use a ruler or measuring tape to center the patch. This prevents skewing and helps maintain uniformity, especially when applying multiple patches.
  3. Mark the Position: Lightly mark the fabric with a fabric pencil where the edges of the patch will be. This acts as a guideline and helps in accurate placement before ironing.
  4. Check Alignment: Before finalizing the position, step back and examine the patch from different angles to confirm it’s visually balanced. Adjust as needed before proceeding to the next steps.

These steps help in achieving a professional and durable application, enhancing both the functionality and style of the fabric.

Setting Up the Iron

Before you begin the application of your DIY patch, it is critical to properly set up your iron. Confirm that you select the correct temperature suitable for the fabric of your garment to prevent any damage—different materials will require different heat settings. Additionally, it is important to clean the surface of the iron to confirm no residue or dirt transfers onto the fabric during the pressing process.

Selecting Correct Temperature

Selecting the correct temperature on your iron is essential when applying DIY patch kits to guarantee a strong adhesive bond without damaging the fabric. Understanding the relationship between temperature settings and fabric types is vital in this process. Here’s a guide to help you navigate these settings effectively:

  1. Cotton and Linen: Set your iron to a high temperature, typically between 140°C to 200°C. These fabrics can withstand more heat, which is necessary for the patches to adhere properly.
  2. Wool and Silk: Use a medium temperature setting, generally around 100°C to 140°C. These materials require a gentler approach to avoid scorching or damaging the delicate fibers.
  3. Polyester and Nylon: Select a lower temperature, about 90°C to 130°C. High temperatures can melt these synthetic fabrics, creating an unsightly finish.
  4. Leather and Suede: Opt for a low to medium heat, and always use a pressing cloth as direct contact with the iron can burn these sensitive materials.

Always test your chosen temperature on a small, inconspicuous area of the fabric first to verify that it won’t cause any damage. This precaution helps maintain the integrity of both your fabric and patch.

Preparing Iron Surface

After determining the appropriate temperature setting for your fabric, the next essential step is preparing the iron’s surface to confirm it is clean and free of any residues. This is vital because any leftover sticky substances or dirt on the iron can transfer to the fabric and ruin both the patch and the garment.

First, make sure the iron is unplugged and cool. Wipe the surface with a soft, damp cloth to remove any dust or lint. If stubborn residues persist, use a specialized iron cleaner as per the manufacturer’s instructions, but avoid abrasive materials which could scratch the iron surface. Understanding the iron surface types is important here; stainless steel surfaces are generally more resilient against scratches compared to ceramic or non-stick coatings, which require gentler handling.

Remember that the quality of heat conductivity varies with different iron surface types. Irons with high heat conductivity guarantee more uniform heat distribution, essential for the successful application of iron-on patches. Before you plug the iron back in, double-check the surface for any missed spots or remaining cleaner residue. Only when the iron is thoroughly clean and dry should it be reheated for use. This meticulous preparation helps achieve the best results with your DIY patch kit.

Applying the Patch

Applying the patch correctly is crucial to guarantee a durable repair and seamless finish. The process requires careful attention to detail, particularly in the placement and initial adhesion of the patch. Before beginning, verify your iron surface is prepped as discussed in the previous section.

Here are some essential steps to follow:

  1. Choose the Patch: Select a patch that complements the fabric in both texture and color. Consider patch design ideas that either blend in or stand out based on the desired aesthetic effect.
  2. Positioning: Patch placement tips include aligning the patch precisely where you want it. It should cover the entire area of the tear or design flaw seamlessly.
  3. Secure Temporarily: Use small pieces of heat-resistant tape to hold the patch in place, preventing it from shifting during the application.
  4. Check Alignment: Before applying heat, double-check the placement. Misalignment can lead to uneven attachment and an unprofessional appearance.

Pressing Techniques

Once the patch is securely in place, the next step involves utilizing the correct pressing techniques to guarantee the patch adheres firmly and permanently to the fabric. It is essential to select the right pressing methods and to apply consistent pressure during this process. Begin by setting your iron to the temperature recommended by the patch manufacturer, usually found in the instructions that accompany the kit.

Place a thin pressing cloth or a piece of parchment paper over the patch to protect both the fabric’s surface and the patch from direct heat, which can cause scorching or melting. Press the iron firmly down onto the patch and hold it in place without moving it to maintain steady pressure. This pressure application is vital as it helps the adhesive on the patch to activate and bond securely with the fabric.

Continue to apply pressure for the amount of time specified in the patch instructions, typically between 15 to 30 seconds. Avoid lifting the iron repeatedly as this can weaken the bond being formed. Instead, if the area is large, lift the iron and place it on the next section, ensuring every part of the patch has been evenly heated and pressed.

Cooling and Checking

Patience is key during the cooling phase, as it allows the patch to fully set and integrate with the fabric. Once you have completed the pressing process, it’s important to let the garment rest undisturbed. This stage is vital to guarantee that the patch is securely attached and that the adhesive has properly melted and bonded.

As you enter the cooling process, consider these cooling techniques and checking adhesion steps:

  1. Do Not Disturb: Allow the patch to cool completely without moving the garment. This can take anywhere from 10 to 20 minutes depending on the fabric and the size of the patch.
  2. Check Edges: Gently peel up the edges of the patch to check if it is securely adhered. If the edges lift, additional heat may be required.
  3. Even Cooling: Make sure the garment is laid flat in a cool, dry area away from direct heat sources to avoid uneven cooling, which can impact adhesion.
  4. Re-Press if Necessary: If after cooling the patch hasn’t fully adhered, cover it with a pressing cloth again and apply heat for another 10-15 seconds.

Always handle the patched area gently during the checking phase to avoid disrupting the bonding process.

Caring for Patched Items

Maintaining the integrity and appearance of patched items requires specific care practices. Understanding effective patch maintenance tips and appropriate wash care is essential for longevity. When laundering patched garments, always turn the item inside out. This shields the patch from direct exposure to harsh washing processes and protects its adhesive and fabric.

Use cold water for washing, as hot water can weaken the adhesive bond and cause the patch to peel off. Selecting a gentle cycle minimizes the agitation that can fray the edges of your patch. It’s advisable to use a mild detergent that’s free of bleaching agents; harsh chemicals can fade and damage both the patch and the fabric of your garment.

After washing, avoid wringing out the patched item. Instead, gently squeeze out excess water. For drying, lay the item flat or hang it up to air dry. Avoid using a dryer as the intense heat can soften the adhesive, leading to detachment or curling of the patch edges.

Ironing should be done with care. Place a thin cloth over the patched area and use a low heat setting to avoid melting the adhesive. Following these guidelines will help guarantee your patched items remain vibrant and intact.

Troubleshooting Common Issues

When utilizing DIY patch kits, users often encounter specific challenges that can compromise the effectiveness of their repairs. One frequent issue is the patch not adhering properly, often due to uneven heat application during the sealing process. Additionally, there are concerns about potential fabric damage, which necessitates careful handling and adherence to the product instructions.

Patch Not Adhering

Why might a patch fail to adhere properly? When using DIY iron-on patch kits, achieving strong patch adhesion can sometimes be challenging. To troubleshoot this common issue, several factors need to be considered. Here are key troubleshooting tips to guarantee your patch adheres securely:

  1. Fabric Compatibility: Some fabrics are not suitable for iron-on patches. Materials like nylon, silk, and waterproof fabrics can prevent patches from sticking effectively. Always check the fabric compatibility listed on the patch kit.
  2. Adhesive Quality: The quality of the adhesive on the patch plays a vital role. If the adhesive layer is too thin or uneven, it might not melt properly, leading to poor adhesion. Confirm the patch’s adhesive is intact and evenly distributed.
  3. Pre-application Fabric Treatment: Fabrics that are dirty or have residues like oils or fabric softeners can hinder adhesion. Clean the area where the patch will be applied thoroughly and make sure it is dry.
  4. Pressure During Application: Applying sufficient pressure is essential for the adhesive to activate and bond. Make sure to press down firmly with the iron, according to the instructions provided with the kit.

Understanding these aspects will greatly improve your success with DIY patch kits.

Uneven Heat Application

Another notable factor that affects the success of DIY patch applications is uneven heat distribution during the ironing process. When heat is not applied consistently across the patch, it leads to weak adhesion in some areas while possibly overheating in others. This disparity can greatly compromise the overall durability of the patch, making it prone to peeling off or wearing out prematurely.

It’s vital to ascertain that your iron is set to provide uniform heat and that you apply this heat evenly across the entire surface of the patch. Using a heat press can offer more consistent results, but if an iron is your tool of choice, consider using a pressing cloth and a reliable thermometer to monitor the temperature. Move the iron slowly in a circular motion, making certain that each section of the patch receives equal attention and time under the heat.

Moreover, patches vary in their heat sensitivity and thickness, which can affect how heat is absorbed and distributed. Always refer to the manufacturer’s guidelines for the recommended heat settings and application times. Adhering to these instructions not only promotes better heat distribution but also enhances the longevity and appearance of your patch.

Fabric Damage Concerns

How can one avoid fabric damage when applying DIY patches? When using iron-on patches, it’s essential to understand that not all fabric types react the same way to heat, and patch durability can be compromised if not applied correctly. To guarantee both the longevity of your patch and the integrity of the fabric, consider the following steps:

  1. Choose the Right Fabric: Some fabrics, like polyester or delicate silks, are more susceptible to heat damage. Opt for cotton or denim which are more durable and heat-resistant.
  2. Test Before Applying: Always test the iron on a hidden part of the fabric to check how it reacts to the heat. This can prevent scorching or melting unexpected fabric types.
  3. Use a Protective Barrier: Place a thin cloth or parchment paper between the iron and the patch. This barrier helps distribute the heat evenly and prevents direct contact that might burn the fabric.
  4. Adjust Heat Settings: Not all fabrics require the same heat level. Adjust your iron to suit the fabric type, using lower settings for more delicate materials.
diy patch creation kits

How to Create Your Own Patches With DIY Kits

Creating your own patches using DIY kits involves selecting the appropriate kit and supplies that cater to your skill level and project demands. First, choose a kit from trusted brands like Singer for beginners or Brother for more advanced features. Each kit typically includes essential items such as needles, thread, and fabric adhesives—components vital for the durability and appearance of your patches. Decide between different patch types—embroidered, iron-on, or woven—based on your design preference and the functionality required. Utilizing these materials correctly guarantees a successful application that withstands wear and washing, preserving the expressive art of your patches. With the right approach, the possibilities for creative and personal expression are vast, encouraging further exploration of this craft.

Choosing Your Patch Kit

Selecting the right patch kit is essential for anyone looking to customize or repair their apparel and accessories effectively. When exploring patch kit features, consider the variety of tools and materials included. A thorough kit should offer a range of needles, thread types, and perhaps even a selection of fabric adhesives. It’s also beneficial if the kit includes different fabric colors and textures to match or contrast with your projects.

Among the notable patch kit brands, both Singer and Brother provide options that cater to beginners and seasoned crafters alike. Singer’s kits are widely appreciated for their user-friendliness, making them a great starting point for novices. On the other hand, Brother’s kits tend to include more advanced features suited to those with some experience in fabric crafts.

It’s important to assess the quality of the components. High-quality thread and durable needles can make a significant difference in the ease of your project and the longevity of your repairs or decorations. Always check product reviews and perhaps consult crafting forums to verify that the kit you choose meets your specific needs regarding functionality and reliability.

Understanding Patch Types

Delving into the domain of DIY patches, it is vital to grasp the various types available, each suited to different materials and purposes. Embroidered patches, featuring raised patterns of thread, offer a classic look and are highly durable, making them ideal for custom designs that stand out. Iron-on patches provide ease of use, as they can be fixed to fabric with heat, and are best for quick applications where sewing is not feasible. Woven patches, on the other hand, allow for finer detail in design, suitable for intricate logos or text, and can be applied to a variety of fabric choices.

Understanding the differences in patch sizes and themes is important for effective patch placement on garments or accessories. Smaller patches might be favored for subtle additions to personal items, while larger patches can make bold statements on jackets or backpacks. The history of patches goes back to military and group identities, but today, they are a popular means of self-expression and customization.

Durability and fabric compatibility should also guide your selection, ensuring that your patch maintains its appearance and adherence over time. By considering these factors, you can choose the right type of patch to meet your creative or practical needs.

Gathering Additional Supplies

Before commencing your DIY patch project, it is vital to assemble all necessary supplies beyond the patches themselves. Choosing the right fabric types is important as each material behaves differently under needle and thread. Cotton and denim are forgiving for beginners, while materials like nylon and polyester require more careful handling to avoid puckering.

Next, gather the essential tools for your project. A sturdy embroidery hoop and sharp scissors make a significant difference in the ease and quality of your work. Look for embroidery needles, which are specially designed to handle the intricacies of patch making. Thread choice is also important; polyester threads are durable and colorfast, a significant consideration for items that will be frequently washed.

Don’t overlook the practical items like a seam ripper for correcting mistakes and an iron for pressing your fabric before you begin. This preparation helps in achieving a smoother finish.

Lastly, make sure you have a well-lit workspace. Adequate lighting is not just a comfort; it’s a necessity for avoiding eye strain and guaranteeing the precision of your stitches. With these supplies assembled, you’re ready to move forward confidently in your patch creation endeavors.

Designing Your Patch

With your supplies ready, the next step in creating your DIY patch is to find service for designing it. This phase is essential as it sets the visual appeal and individuality of your patch. Start by selecting a theme or a concept that resonates with your personal or project-related goals. Are you aiming to make a statement, showcase a hobby, or represent a group or event? Your answer will guide your design process.

Next, consider the graphic styles that will best express your theme. Whether you opt for bold, minimalist, or intricate designs, make sure that your choice aligns with the message you intend to convey. This is where your creativity truly shines, as the design’s complexity can range from simple shapes to detailed illustrations.

Color combinations play a significant role in the impact of your patch. Choose colors that not only attract the eye but also complement each other well. Understanding basic color theory can be immensely helpful here. For instance, contrasting colors can make your design pop, while analogous colors offer a more harmonious look.

Preparing to Make Your Patch

Once your design is finalized, the next step is to gather all necessary materials and tools to create your patch. Identifying the right patch materials is vital; you’ll need fabric, thread, and any specialized items like adhesive backing or iron-on materials depending on your patch type. Essential tools include a sturdy needle, embroidery hoop, and scissors. Confirm that you have a clean, flat surface to work on.

Using design software is pivotal at this stage. Even after you’ve drawn your initial concept, software can help refine the design to guarantee it is suitable for patch creation. This might include adjusting the scale, altering colors to match available thread types, or simplifying details to suit embroidery or appliqué techniques.

It’s also important to source high-quality materials. The durability and appearance of your finished patch depend greatly on using fabrics and threads that not only look good but will withstand wear and tear. As you prepare, consider the purpose of your patch—whether it’s for aesthetic appeal on a denim jacket or practical use on a canvas backpack—and choose materials that align with this usage. This preparation will set the foundation for a successful patch creation process.

Step-by-Step Patch Creation

Initiating the actual construction of your patch, begin by placing your chosen fabric tightly in an embroidery hoop. This foundational step is essential to maintain the fabric’s stability and prevent any unwanted movement that could disrupt your embroidery work.

As you proceed, consider the following steps to guarantee your patch is both aesthetically pleasing and durable:

  1. Select Appropriate Patch Materials: Choose high-quality thread and fabric that will not only hold up to wear and tear but also pass the test of time. Cotton and polyester blends are popular for their resilience and color retention.
  2. Outline Your Design: Lightly sketch your design onto the fabric using a fabric marker that easily washes out. This preliminary outline serves as a guide and guarantees precision in your embroidery work.
  3. Apply Patch Techniques: Utilize various embroidery stitches such as the satin stitch, back stitch, or chain stitch to fill in your design. Each stitch offers a different texture and appearance, so choose according to the look you desire. Remember, the tighter and more consistent your stitches, the more professional the final product will look.

Applying Patches to Fabrics

After creating your custom patch, the next essential step involves properly attaching it to your desired garment or fabric. Mastering patch application techniques guarantees longevity and enhances the appearance of your clothing. Two primary fabric adhesion methods exist: sewing and iron-on. Sewing is the most durable method, suitable for heavily-used items like backpacks and jackets. This technique requires threading a needle and stitching around the edges of the patch to secure it to the fabric. It’s important to use a thread color that matches the edge of the patch for a seamless look.

Alternatively, the iron-on method is quicker and suitable for beginners. It involves placing the patch on the fabric, covering it with a thin towel, and pressing a hot iron over it for about 15-30 seconds. Ascertain the heat is evenly distributed to activate the glue on the back of the patch effectively. However, this method may not hold as permanently as sewing, especially on fabrics that undergo frequent washing.

Whichever method you choose, make sure the fabric is clean and smooth before application. Properly attaching your patch not only enhances its aesthetic appeal but also guarantees it stays intact through wear and tear.

Caring for Your Patches

Maintaining the quality and appearance of your DIY patches is essential for their longevity. Proper care involves specific washing and drying procedures to prevent damage, as well as careful ironing to guarantee they remain affixed and look their best. Additionally, when not in use, knowing how to store your patches correctly can greatly extend their life and maintain their vibrant colors and textures.

Wash and Dry Properly

To guarantee the longevity and appearance of your DIY patches, proper washing and drying techniques are essential. Handling your patches with care guarantees they remain vibrant and intact throughout their use. Here are essential steps to follow:

  1. Choose the Right Detergent: Opt for mild detergents that are suitable for delicate fabrics. Harsh chemicals can deteriorate the thread and fabric of your patches, leading to fading and fraying. Always check the detergent label to confirm it’s appropriate for the material of your patch.
  2. Washing Techniques: Hand wash your patches gently in cold water. Avoid using the washing machine, as the intense agitation and spin might cause the patches to peel off or become misshapen. Submerge the patches in soapy water and lightly agitate them with your hands, then rinse thoroughly to remove any soap residue.
  3. Drying Method: Never wring out your patches, as this can distort their shape. Instead, press out excess water gently between two soft towels. Lay flat to air dry on a clean surface. Avoid direct sunlight and high heat, as these can cause the colors to fade and the fabric to weaken.

These fabric care steps will greatly extend the life and look of your DIY patches.

Ironing Your Patches

Once your DIY patches are clean and dry, the next step in their care involves proper ironing techniques to confirm they maintain a neat appearance and secure attachment. Ironing not only smooths out any wrinkles but also helps the adhesive on the patch to bond more securely to the fabric. It’s imperative to use the correct heat settings and patch placement to avoid damage.

Before you start, confirm your iron’s surface is clean and free of any residue that could transfer to the patch or fabric. Here’s a quick guide to help you iron your patches correctly:

Step Description
1. Positioning Place the patch exactly where you want it on the fabric. Use a ruler for precise alignment.
2. Heat Settings Set your iron to the “cotton” setting or according to the patch manufacturer’s instructions.
3. Protective Layer Lay a thin towel or a piece of parchment paper over the patch to protect it from direct heat.
4. Applying Heat Press the iron down firmly for 15-20 seconds without moving it to confirm even heat distribution.
5. Cooling Allow the patch to cool completely before testing its attachment.

Long-term Storage Tips

Proper storage of your DIY patches is essential for preserving their quality and appearance over time. The conditions in which you store your patches can greatly impact their longevity and visual appeal. To help maintain your patches in pristine condition, consider the following storage tips:

1. Avoid Direct Sunlight and High Humidity:

Keep your patches in a cool, dry place away from direct sunlight. Exposure to UV rays can fade colors and degrade materials, while high humidity can lead to mold or mildew, damaging the fabric and adhesive elements of the patches.

2. Use Acid-Free Storage Materials:

Store your patches in acid-free containers or envelopes. Acidic materials can cause discoloration and deterioration over time. By using acid-free storage solutions, you help guarantee that the chemical composition of your patches remains stable, thereby preserving their integrity and appearance.

3. Flat Storage Is Key:

Whenever possible, store your patches flat. This prevents them from bending or creasing, which can permanently affect their shape and adherence capabilities. If storing multiple patches together, consider placing a piece of acid-free paper between each layer to avoid them sticking together or transferring colors.

Creative Ideas and Inspiration

Exploring unique patch design tips can transform your DIY projects into personalized art pieces, allowing for a creative expression that stands out. Additionally, upcycling old fabric not only gives new life to discarded materials but also promotes sustainability in crafting. These practices not only enhance aesthetic appeal but also contribute to a more environmentally conscious approach to fashion and decoration.

Unique Patch Design Tips

Creating unique patches begins with embracing your personal style and the story you want to tell through your design. The process of designing a patch that stands out involves thoughtful consideration of color theory and motif selection. Here are three key tips to guide you in crafting a patch that is both unique and reflective of your personal aesthetic:

  1. Explore Color Theory: Understanding color theory can dramatically enhance the impact of your patch. Choose colors that complement each other and create a pleasing visual harmony. Consider the emotions and messages different colors convey to make your patch communicate more effectively.
  2. Select a Distinctive Motif: The motif is the central visual element of your patch. Select a design that resonates with your personal or cultural identity. This could be anything from a traditional symbol, a modern abstract design, or even a quirky, personalized icon.
  3. Incorporate Textural Elements: Adding varied textures through materials like metallic threads, beads, or layered fabric can add depth and intrigue to your patch. This tactile dimension not only enhances the aesthetic but also makes your patch feel unique to the touch.

Upcycling Old Fabric Ideas

Having established the fundamentals of designing unique patches, another intriguing application of your creative skills involves the upcycling of old fabric. Utilizing eco-friendly materials not only supports environmental sustainability but also allows you to engage in artistic expressions that are unique and personal. Vintage fabric, for instance, can serve as a rich source of inspiration for fabric sourcing, offering unique textures and patterns not found in newer materials.

Textile recycling involves the transformation of old clothes or fabric scraps into new creations. By applying fabric paint, you can refresh faded colors or add vibrant new designs. Sewing techniques such as appliqué or embroidery enhance these pieces with patch embellishments, further personalizing your projects.

When selecting patch themes, consider the story behind the vintage fabric—every print and hue might suggest a narrative that enhances the overall artistic value of your patch. Effective color combinations are essential; they can either blend seamlessly with the existing fabric or contrast dramatically to highlight your patch.

Through these methods, you not only cultivate your sewing skills but also contribute to a more sustainable practice by repurposing materials that might otherwise end up discarded. This approach not only saves resources but also enriches your creative portfolio with unique, environmentally conscious projects.

rocker patches in motorcycling

What Are Rocker Patches? Understanding Their Role in Motorcycle Culture

Rocker patches are curved embroidered badges that signify membership, status, and regional affiliation within motorcycle clubs, playing a central role in the club’s visual and cultural identity. Originally emerging in the post-World War II era among veteran bikers, these patches have evolved to represent loyalty, hierarchy, and respect among members. The top rocker typically displays the club’s name, while the bottom rocker may show a geographic territory. Misunderstanding their significant meaning can lead to serious conflicts, underscoring the importance of respecting the symbols within this tight-knit community. For more context, further exploration reveals how these patches are not only earned but also revered.

Definition of Rocker Patches

Rocker patches are distinctive, curved embroidered patches typically worn on the back of a motorcycle club member’s vest or jacket. These patches are more than mere decorations; they are a vital part of the identity and hierarchy within the motorcycle club culture. Each patch design carries deep cultural significance, often reflecting the club’s ethos, territorial claims, and the individual rider’s status within the group.

The careful crafting of these patches is essential. Usually positioned above and below the central club emblem, rocker patches denote affiliation and rank, serving both as a badge of honor and a mark of responsibility. The top rocker typically displays the name of the club, while the bottom rocker shows the region or chapter to which the member belongs. This dual structure reinforces a sense of community and commitment among members.

Understanding the importance of these patches helps outsiders grasp the tightly knit, complex social structures within motorcycle clubs. Misinterpreting or disrespectfully using these symbols can lead to serious misunderstandings or conflicts, underscoring the need for awareness and respect for these emblems within the broader community.

Historical Origins

The historical origins of rocker patches trace back to early biker gangs, where they first emerged as symbols of allegiance and collective identity. Over time, the symbolism of these patches has evolved, reflecting changes in the ethos and dynamics within motorcycle clubs. This transformation underscores the patches’ integral role in the visual and cultural lexicon of motorcycle communities.

Early Biker Gangs

In the aftermath of World War II, many returning veterans found themselves seeking camaraderie and adrenaline, similar to what they had experienced during their service. This longing led to the emergence of early biker gangs, forming a pivotal chapter in the history of biker culture. These groups offered a sense of belonging and structure, which were greatly missing in their civilian lives. Motorcycle clubs initially revolved around shared interests in riding, but soon, the intensity of the bonds among members began to mirror familial ties.

The dynamics within these early gangs were complex. Loyalty and brotherhood were paramount, often underscored by a rigorous set of unwritten rules that dictated the behavior within the group. These rules helped maintain order and a sense of purpose, aligning closely with military discipline that the veterans were accustomed to. As these motorcycle clubs grew, their identities became more distinct, with specific insignias and rocker patches that signified their allegiance and status within the gang.

Understanding these early formations of biker gangs reveals much about the evolution of gang dynamics and the deep-rooted traditions that continue to influence modern motorcycle clubs. The shift from a group of motorcycle enthusiasts to organized clubs reflects a considerable cultural change within this community.

Symbolism Evolution

As motorcycle clubs evolved, their use of symbols, particularly rocker patches, underwent significant transformation. Initially, these patches were straightforward, indicating basic information such as the club name and locale. However, since the cultural significance of motorcycle clubs deepened, these emblems became more intricate, reflecting not only membership but also the ethos and hierarchy within the clubs.

Rocker patches started to feature design variations that were rich in symbolism. For instance, a skull might represent a defiance of death, while flames could symbolize a club’s enduring passion for riding. The evolution of these designs was not merely for aesthetic appeal but served as a coded language among bikers. This language conveyed messages about loyalty, brotherhood, and sometimes, territorial claims.

Understanding the symbolism in rocker patches is essential for appreciating their role in motorcycle culture. Each patch is a declaration of identity, a badge of honor, and at times, a marker of achieved milestones within the club. Consequently, these patches do more than decorate a jacket; they narrate the history and the values of those who wear them, stitching together a community bonded by the road and respect for one another.

Symbolism and Meaning

Rocker patches serve as potent symbols within motorcycle clubs, encapsulating elements such as group identity, hierarchical status, and personal achievements. These embroidered insignias not only denote membership to a particular club but also often reflect the individual member’s rank and notable accomplishments within the group. Understanding these symbols provides insight into the complex social structures that govern motorcycle clubs and the deep personal pride members take in their affiliations and achievements.

Group Identity Markers

Why do rocker patches hold such significance in motorcycle culture? These embroidered pieces of fabric are more than just decorative accessories; they serve as powerful symbols of identity and community within the biker world. Rocker patches are critical in expressing group identity and fostering community bonding among members. Here’s how they function within this unique subculture:

  1. Identity Expression: Each patch is a visual representation of membership to a specific motorcycle club or group, showcasing an individual’s allegiance and role within the community.
  2. Community Bonding: By wearing similar patches, members create a sense of unity and belonging, strengthening the ties within the group and distinguishing them from others.
  3. Tradition and Ritual: The process of earning and wearing rocker patches is steeped in tradition, involving rituals that reinforce group values and history.
  4. Visual Communication: These patches communicate messages to those within and outside the community, often indicating a shared ethos or philosophy.

Rocker patches are emblematic of the rich, complex social structures that define motorcycle clubs. They encapsulate the pride, commitment, and the shared identity of their wearers, making them indispensable in the biker community.

Rank and Hierarchy Indicators

Beyond their role in fostering group identity and unity, rocker patches also serve a critical function in delineating rank and hierarchy within motorcycle clubs. These patches are not just decorative elements but are pivotal in the social dynamics of biker culture. Each patch’s design and placement convey specific meanings, which are universally recognized within the community.

The upper and lower rockers might display the club’s name and location, but it’s the central patch that holds significant weight in indicating a member’s rank and role. For example, patches may signify leadership positions like President or Treasurer, directly reflecting the wearer’s level of authority and responsibility. This visual hierarchy enforces group loyalty and maintains order within the club.

Moreover, the patches also symbolize motorcycle symbolism and cultural significance, extending beyond mere gang affiliations. They represent a form of identity expression and personal pride, deeply embedded in the fabric of the club. Therefore, by understanding patch meanings, one gains insight into the complex structure and the profound sense of belonging that these emblems foster within the motorcycle community.

Personal Achievements Display

Often, individual achievements and milestones are celebrated within motorcycle clubs through the customization of rocker patches, which carry deep symbolic meanings. These patches serve not only as identifiers but also as personal badges of honor, showcasing the pride and respect accumulated through various personal milestones. The following list highlights how rocker patches reflect personal achievements within the biker community:

  1. Years of Membership: Rocker patches can display the number of years a member has been part of the club, symbolizing loyalty and dedication.
  2. Special Skills: Whether it’s exceptional mechanical skills or a knack for leadership, special abilities are often commemorated through unique patch designs.
  3. Charitable Endeavors: Participation in charity rides and events is a significant aspect of club activities. Patches can denote the extent of an individual’s involvement in these altruistic efforts.
  4. Riding Accomplishments: Completing challenging tours or famous routes can earn members specific patches that express both pride and personal achievement.

These patches do more than decorate a jacket; they narrate a personal journey within the motorcycle community, fostering a sense of belonging and mutual respect among members. Each patch is a story of commitment, skill, and personal growth.

Types of Rocker Patches

Rocker patches are integral elements of motorcycle club attire, representing membership, rank, and territorial claims. These patches come in various types, each signifying a different aspect of club life and personal identity within the group. The most common types include name rockers, which display the wearer’s club name, and territory rockers, indicating the geographic area the club claims.

Beyond these, members may wear title rockers that show their role or rank within the club, such as “President” or “Road Captain”. These patches help maintain order and hierarchy within the club by visually communicating each member’s status to others both inside and outside the club.

Custom designs in rocker patches are especially popular, allowing clubs to showcase their unique symbols or slogans that reinforce their identity and ethos. Members often take pride in expanding their patch collections, which can include commemorative or event-specific rockers that chronicle their participation in motorcycle rallies or charitable events. These collections can become quite extensive, serving not just as personal mementos but also as records of a club’s history and activities. Each patch, while small, carries substantial weight in the biker community, symbolizing respect, commitment, and camaraderie.

Earning Rocker Patches

Many motorcycle clubs adhere to rigorous processes for earning rocker patches, which are seen not merely as decorations but as symbols of loyalty and achievement. The journey to earn these patches involves more than just riding skills; it requires a deep commitment to the club’s values and active participation in its community.

Earning techniques and community involvement include:

1. Prospecting Period:

Typically, a prospective member undergoes a probationary period. During this time, they must demonstrate commitment to the club’s ethos and willingness to support fellow members. This period can last from several months to over a year, depending on the club’s standards.

2. Attendance at Club Events:

Regular participation in club meetings and events is essential. This shows dedication and fosters a sense of brotherhood among members.

3. Community Service:

Engaging in community service projects under the club’s banner not only benefits the public but also reinforces the positive impact of the club in society.

4. Voting Process:

After fulfilling the necessary criteria, the final decision to award a patch often lies in a vote by existing members. This guarantees that all members feel the individual is worthy of representing their shared values and symbols publicly.

Earning a rocker patch is a mark of honor that requires dedication, respect, and active involvement.

Rocker Patches and MC Hierarchy

While rocker patches symbolize individual achievement and loyalty within a motorcycle club, they also play an essential role in defining the club’s internal hierarchy. These patches are not merely decorative elements but are pivotal in illustrating the structure and rank within the club. The patch design often includes specific symbols or titles that indicate a member’s role or status, from prospects to full-patched members and officers such as the President, Vice President, Secretary, and Treasurer.

Rocker patches enhance biker camaraderie by fostering a sense of belonging and identity among members. They are visual representations of a member’s journey and commitments within the club. The top rocker typically displays the club’s name, while the bottom rocker shows the region they represent. The centerpiece, often a club-specific logo or emblem, binds the top and bottom rockers, symbolizing the unity of the club.

The hierarchy indicated by these patches is deeply respected within the motorcycle community. Each position comes with specific responsibilities and a progression system that is rigorously upheld. This structured approach helps maintain order and respect among members, ensuring that the club operates smoothly and upholds its values and traditions.

Rules and Etiquette

Understanding and adhering to specific rules and etiquette is fundamental in the world of motorcycle clubs, particularly when it comes to the use and display of rocker patches. Here are some key guidelines:

  1. Earn Your Patch: Rocker patches are symbols of commitment and respect within the motorcycle community. Members must earn the right to wear these patches through loyalty and service to their club.
  2. Proper Placement: Patch placement is essential and follows strict club rules. Typically, the club’s emblem is at the back center of the vest, with the top rocker showing the club’s name and the bottom rocker indicating the chapter’s location.
  3. Respect Hierarchy: Each club has a hierarchy that must be respected. Senior members’ opinions on patch etiquette and placement should be adhered to without question, as these members have earned their status through years of dedication.
  4. Avoid Misrepresentation: It’s vital not to wear patches that could be mistaken for those of another club or imply a rank or affiliation that has not been earned. Misrepresentation can lead to serious misunderstandings within the motorcycle community.

Following these guidelines helps maintain harmony and respect among various groups and protects the cultural significance of rocker patches.

Controversies and Conflicts

Despite the established rules and cultural significance of rocker patches within motorcycle clubs, these symbols often spark controversies and conflicts. These disputes can stem from misunderstandings over patch designs to more serious issues involving biker rivalries and territorial claims. Rocker patches, which are traditionally earned and worn with pride, can sometimes become focal points for conflicts between different motorcycle clubs.

Patch disputes are not just about the cloth itself but signify deeper issues such as respect, identity, and dominance within the biker community. When a new club adopts a patch similar to that of an established club, it can be seen as an infringement or challenge, leading to tensions and sometimes violent confrontations. Below is a table that outlines common sources and outcomes of rocker patch controversies:

Source of Controversy Typical Outcome
Similar Patch Designs Disputes, sometimes mediation
Territorial Claims Increased tensions, rivalries
Unauthorized Wearing Confrontation, club enforcement
Misinterpretation of Symbols Clarification, potential conflict
New Club Formation Surveillance, resistance by established clubs

Understanding these dynamics is significant for anyone involved in or studying motorcycle club culture, as it sheds light on the complex social structures within these communities.

Rocker Patches Today

Although rocker patches have historically been marred by controversies, today they continue to play an essential role in motorcycle club culture, evolving with both aesthetic and symbolic nuances. Modern interpretations of these patches reflect a blend of tradition and personal expression, making them more than just emblems of affiliation.

Here are four key aspects of rocker patches in today’s context:

  1. Identity and Belonging: Rocker patches remain a powerful symbol of identity and membership within a club. They signify a rider’s commitment and loyalty to the group’s ethos and brotherhood.
  2. Fashion Statements: Increasingly, rocker patches are seen as fashion elements. Non-members and fashion designers incorporate these designs into mainstream clothing, often without understanding the deep-rooted significance behind them.
  3. Evolution of Design: The aesthetic of rocker patches has evolved. Clubs now integrate more intricate and visually appealing designs that resonate with modern artistic trends.
  4. Cultural Sensitivity: There’s a growing awareness about the cultural significance of rocker patches. This knowledge urges both wearers and observers to approach these symbols with respect, recognizing their deep ties to specific motorcycle club histories and hierarchies.

These elements highlight the complex layering of tradition and contemporary influences shaping the use of rocker patches today.

custom biker patches creation

5 Quick Ways to Create Club Insignia With Custom Biker Patches

Creating club insignia with custom biker patches requires strategic design choices to foster a strong, cohesive identity. To begin with, select a distinctive shape that aligns with your club’s ethos, such as gears for a technology club. Incorporating meaningful symbols, like a wheel for progress, can enhance the emblem’s significance. Choose colors wisely; for example, red symbolizes strength and is also highly visible. When deciding on embroidery details, prioritize legibility and durability by opting for high-density stitching with quality, fade-resistant threads. Engage a reputable manufacturer to guarantee the final product reflects your vision and maintains quality standards. As you explore further, more nuances behind effective insignia creation will reveal themselves, enhancing your club’s brand and unity.

Choose a Distinctive Shape

Selecting a unique shape for your club’s insignia is vital in establishing its identity and distinguishing it from others. When initiating the creation of a club insignia, the choice of a distinctive shape serves not only as a visual identifier but also as a symbol of the group’s ethos and values. This decision requires a thoughtful approach, blending unique designs with creative inspiration drawn from the club’s purpose and activities.

Consider shapes that are not commonly used by other clubs to guarantee your insignia stands out. For example, instead of traditional circles or shields, think about abstract forms or even silhouettes that reflect your club’s focus, like a gear for a technology club or a feather for a literary society. Each shape communicates a different feel and message, so it’s important to select one that aligns closely with the club’s image and objectives.

Moreover, engaging members in the design process can foster a deeper connection to the club’s identity. This collaborative approach not only enhances creativity but also guarantees that the final design resonates with all members, making the insignia a true representation of your club’s unique spirit and ambition.

Selecting Symbols and Icons

Incorporating relevant symbols and icons into your club’s insignia can profoundly impact its recognition and meaning. When designing custom biker patches, it’s vital to select symbols that resonate with the ethos of the group. The icon significance should align with the club’s identity and values, often drawing from cultural meanings that enhance the overall image and ethos of the group.

Choosing the right icons involves understanding their historical and cultural implications to avoid misrepresentation or unintended offense. Here’s a table showcasing common symbols and their meanings:

Symbol Icon Significance Cultural Meanings
Skull Mortality, caution Strength, defiance
Eagle Freedom, authority American spirit
Wheel Progress, journey Continuity, cycle of life
Flames Transformation, passion Rebirth, change

Each icon carries distinct meanings that can deeply influence public perception and internal morale. It’s important to take into account how these symbols will be perceived both within the club and by the wider community. Thoughtful selection can foster a strong, unified identity that members can wear proudly, embodying the spirit and values of the club through every emblematic detail.

Pick the Right Colors

After considering the symbolic significance of various icons, choosing the appropriate colors for your biker patches is equally important. The colors you select not only reflect the identity of your club but also convey specific emotions and messages through the science of color psychology. Thoughtful selection of color combinations can enhance visibility and recognition, which are essential for establishing your club’s presence.

Here are a few tips to guide you in choosing the right colors for your custom biker patches:

  1. Understand Color Psychology: Different colors evoke different feelings and associations. For instance, red can signify passion and energy, while blue might represent loyalty and trustworthiness.
  2. Consider Visibility and Contrast: Make certain that the colors you choose stand out against the material of the jackets or vests. High contrast color combinations can make your patches more readable and striking from a distance.
  3. Reflect Club Identity: Choose colors that are historically or culturally significant to your club. This strengthens the bond among members and enhances the group’s identity.
  4. Test Color Combinations: Before finalizing, experiment with various color combinations to see what best represents your club’s ethos and is aesthetically pleasing.

Decide on Embroidery Details

Choosing the right embroidery details is vital for creating distinctive and durable biker patches. When designing these patches, the choices of font selection and patch size are critical. The font should be legible yet stylish, reflecting the club’s identity while guaranteeing that the text is readable from a distance. Consider bold, uncomplicated fonts that stand out against intricate backgrounds. In addition, the size of the patch must correspond to the amount of detail you wish to include. Larger patches allow for finer embroidery details and a clearer display of intricate logos and texts.

Additionally, the density of the embroidery contributes considerably to the patch’s longevity and appearance. High-density embroidery makes the patch sturdier and more resistant to wear and tear, which is vital for biker patches that are often exposed to outdoor elements. It’s also important to decide whether the embroidery will cover the entire patch or just a portion of it. Full coverage guarantees maximum impact and color fidelity, while partial embroidery can be used effectively for a more subtle design.

Lastly, keep in mind the thread quality. Opt for high-quality, fade-resistant threads to maintain the color and vibrancy of your patch through sun exposure and laundering. This attention to detail will enhance the overall aesthetics and durability of the biker patches.

Ordering and Production Tips

Once the design details of your biker patches are finalized, it is vital to focus on the ordering and production process to guarantee quality and timely delivery. This stage is significant in transforming your design inspiration into tangible symbols of club identity. To navigate this process effectively, consider the following steps:

  1. Choose the Right Manufacturer: Select a producer who not only offers a variety of material options but also demonstrates a clear understanding of your vision and provides samples for approval.
  2. Clarify Material Specifications: Specify the types of fabrics and threads to be used. This decision impacts both the look and durability of your patches, so choose wisely based on the needs of your club and the advice of your manufacturer.
  3. Review Production Samples: Before full-scale production begins, inspect a sample patch. This is your opportunity to make any necessary adjustments to guarantee the final products meet your expectations.
  4. Set Clear Deadlines: Establish and communicate your timeline needs. This helps prevent any last-minute rushes that could compromise the quality of your custom patches.
perfect color matching tips

5 Tips for Perfect Color Matching in Custom Logos

Achieving perfect color matching in custom logos involves understanding color psychology and its emotional influence, ensuring colors align with your brand’s identity and appeal to your target demographic. Utilize the color wheel to explore harmonious or contrasting schemes, which can greatly enhance brand recognition and messaging. Digital tools are indispensable for visualizing and adjusting palette options, while physical testing in various lighting and on different materials guarantees the intended impact is consistent across all mediums. This meticulous approach not only enhances visual appeal but also fortifies the logo’s effectiveness in consumer connection, paving the way for deeper insights into branding success.

Understand Color Psychology

Color psychology plays a vital role in the designing of custom logos, as different colors can evoke specific emotional responses from viewers. When a designer selects colors, they are not only focusing on aesthetics but also on the psychological impact these colors will have. For instance, blue can instill a sense of trust and security, often used by banks and healthcare services, while red might trigger excitement and urgency, a common choice for clearance sales.

Moreover, the cultural significance of colors adds another layer of complexity. In some cultures, white symbolizes purity and peace, whereas in others, it may represent mourning and loss. This cultural context is important in logo design as it affects how a brand is perceived by different demographic segments. Ignoring these cultural nuances can lead to misinterpretation and potentially alienate a part of your audience.

Therefore, understanding the emotional and cultural implications of color choices is vital for creating an effective logo. This knowledge guarantees that the logo not only catches the eye but also communicates the right message and resonates with the intended audience, fostering a deeper connection between the brand and its consumers.

Utilize Color Wheel Basics

Understanding the basics of the color wheel is essential for effective logo design. Comprehending how colors interact on the wheel allows designers to create visually appealing and coherent logos using principles like analogous color schemes and complementary color theory. Analogous colors are groups of three colors that are next to each other on the wheel, providing a harmonious look, while complementary colors are directly opposite each other, offering a vibrant contrast that can make logos stand out.

  • Analogous Color Schemes: Imagine a sunset where deep oranges blend seamlessly into vibrant yellows, creating a warm, inviting atmosphere.
  • Complementary Color Theory: Picture a sports team logo where the sharp contrast of blue against orange energizes the design, evoking excitement and attention.
  • Color Wheel Dynamics: Envision a flower garden, where the arrangement of colors creates a balance that is both pleasing and natural to the eye.
  • Harmony and Contrast: Think of a corporate logo that uses green and red during the holiday season, striking a perfect balance between warmth and professionalism.
  • Visual Impact: Consider how a well-chosen color palette can make a logo memorable and recognizable, much like iconic brands.

Utilizing these foundational principles correctly guarantees that your logo not only attracts but also retains viewer interest.

Consider Your Brand’s Identity

Evaluating your brand’s identity is an important step in the logo design process. Understanding the core attributes—such as brand values and target audience—helps guarantee that the colors chosen for your logo effectively communicate the right message. For example, if reliability and trust are central to your brand values, shades of blue might be most appropriate, as blue often evokes feelings of dependability and professionalism in many viewers.

Furthermore, consider your target audience’s demographics, such as age, gender, and cultural background, as these factors can influence how colors are perceived. Younger audiences might resonate with more vibrant, energetic colors, whereas a more mature audience might prefer subdued, classic hues. This alignment between color choice and audience perception is essential, as it enhances the relevance and appeal of your brand.

It’s important to remember that each color has psychological connotations that can subconsciously affect how your brand is viewed. Mismatch between color choice and brand values can lead to confusion and dilute your branding efforts. Carefully selecting colors that align with both your brand values and the preferences of your target audience will create a stronger, more cohesive brand identity.

Use Digital Color Tools

Having established the importance of aligning your logo’s color scheme with your brand’s identity and audience preferences, the next step involves selecting the precise shades and tones. Digital color tools are indispensable in this process, helping to guarantee color harmony and consistency across various media. These tools allow designers to experiment with different combinations quickly and efficiently, thereby fine-tuning the visual impact of the logo.

Utilizing digital palettes, you can:

  • Visualize color harmony by experimenting with complementary, analogous, or triadic color schemes.
  • Adjust color tones to match specific moods or industry standards, guaranteeing the logo aligns with brand values.
  • Sample colors from real-world sources to create a palette that truly resonates with existing branding elements.
  • Preview how colors look on different substrates, which can affect the perception of the color.
  • Save and share digital palettes for consistent application across all branding materials.

These tools not only streamline the design process but also greatly enhance the accuracy and effectiveness of your color choices in logo design. By leveraging digital color tools, designers can achieve a more precise representation of the brand visually, enhancing overall brand recognition.

Test Under Different Conditions

Once the preliminary color choices are made using digital tools, it is critical to test these colors under various lighting conditions and on different media. This step is essential because colors can appear drastically different when viewed under various types of lighting or when printed on different materials. For instance, fluorescent lighting can cast a bluish tone on colors, while incandescent lighting tends to warm them up, potentially altering the perceived hue of your logo.

Additionally, material variations can affect how colors are displayed. A color might look vibrant and true-to-tone on a glossy finish but could appear muted on a matte finish due to the way light interacts with the surface. It is thus critical to evaluate these effects when finalizing the colors for your custom logo.

Testing your color choices in multiple scenarios guarantees consistency and reliability in your branding. It prevents the unpleasant surprise of a logo that looks perfect on a computer screen but fails to translate well in print or in outdoor signage. Always remember, the more thorough the testing, the more confident you can be in your color decisions, guaranteeing your logo performs well across all intended platforms.

durable custom patch material

Why PVC Rubber Is the Most Durable Choice for Custom Patches

PVC rubber is acclaimed as the most durable option for custom patches due to its considerable resilience in handling extreme conditions, including intense UV exposure and high humidity, which guarantees its structural and aesthetic retention over time. The soft but sturdy material is specifically crafted to maintain color fidelity and resist fading, while its flexibility allows it to adhere smoothly to various fabrics, enhancing both design possibilities and comfort. Practical for rigorous uses, such as in military uniforms and tactical gears, PVC patches require minimal maintenance, often necessitating only a simple wipe-down to remain in prime condition. These qualities collectively provide a sustainable choice, offering longevity that promises to meet more of your practical needs and expectations.

Unmatched Durability of PVC

Enduring through extreme conditions, PVC (Polyvinyl Chloride) stands out for its unmatched durability, making it an ideal material for custom patches. This robust synthetic plastic polymer is not only resilient but also versatile in its applications, especially in the creation of customized patches that need to withstand frequent handling and exposure to various environments.

One of the notable advantages of PVC is its ability to be molded into a wide range of textures and color options. This versatility allows designers to craft patches with intricate details and vibrant hues that maintain their color fidelity over time, resisting fade that is common in less durable materials. The texture variety available in PVC patches ensures that each design can be unique, providing a tactile quality that enhances the overall aesthetic appeal.

Additionally, the inherent flexibility of PVC contributes to its durability. Unlike other materials that might crack, warp, or fray, PVC retains its shape and integrity under stress. This makes PVC patches particularly suitable for applications where durability is essential, such as military uniforms, outdoor gear, and workwear. The durability and aesthetic flexibility of PVC make it a superior choice for high-quality, long-lasting custom patches.

Superior Weather Resistance

Building on its unmatched durability, PVC also exhibits superior weather resistance, making it an outstanding material for outdoor applications. This quality is particularly significant for items like custom patches that are frequently exposed to the elements. PVC’s inherent UV protection guarantees that these patches won’t fade or degrade under the harsh rays of the sun. This is essential for maintaining the vibrancy and integrity of the patch’s design over time, especially in outdoor gear or apparel that endures prolonged sunlight exposure.

Moreover, PVC’s moisture resistance plays a pivotal role in its suitability for outdoor use. Unlike other materials that may absorb water and deteriorate, PVC patches repel water, preventing damage and maintaining their structural integrity. This characteristic is especially beneficial in humid or rainy environments where exposure to moisture is frequent. By resisting water, PVC patches avoid the common pitfalls of mold growth and material breakdown, guaranteeing a longer lifespan and sustained appearance.

The combination of UV protection and moisture resistance in PVC not only enhances the durability but also guarantees that the aesthetic qualities of the patches are preserved, making it an ideal choice for both practicality and style in varying weather conditions.

Flexibility and Comfort

While PVC is renowned for its durability and resistance to harsh weather conditions, it also offers significant flexibility and comfort, vital for custom patches on wearable items. This adaptability is fundamental in guaranteeing that patches conform to the contours of the fabric they are applied to, enhancing the comfort for the wearer. Additionally, the inherent flexibility of PVC allows for greater design versatility, accommodating a wide range of artistic expressions and intricate detailing without sacrificing the integrity of the design.

PVC patches are not only durable but also provide a variety of texture options, which can enhance both the aesthetic appeal and the tactile experience of the garment. This variety guarantees that each patch can be uniquely tailored to meet the specific needs and preferences of any group or individual, making PVC an excellent choice for customized branding on apparel.

Feature Benefit
Design Versatility Allows for creative and detailed customization
Texture Options Enhances tactile and visual appeal
Flexibility Conforms comfortably to fabric contours
Comfort Reduces irritation and increases wearability

PVC’s attributes make it an ideal material for those seeking practical, yet stylish patch solutions.

Maintenance and Longevity

One of the notable advantages of PVC rubber in custom patches is its low maintenance requirements and impressive longevity. This material is highly resilient, resisting wear and tear under various conditions, which means it requires minimal upkeep to maintain its appearance and functionality. For individuals looking to extend the lifespan of their PVC patches, certain care tips can be particularly beneficial.

To begin with, cleaning PVC patches is straightforward: a simple wipe with a damp cloth will remove most dirt and grime. It is advisable to avoid harsh chemicals, as they can cause the material to degrade over time. Instead, use mild soap solutions for heavier cleaning tasks. Additionally, although PVC is weather-resistant, prolonged exposure to extreme temperatures and direct sunlight should be minimized to prevent warping or fading.

Storing PVC patches in a cool, dry place when not in use also contributes to their longevity. By following these simple care tips, users can guarantee their patches continue to look vibrant and perform well for years. These maintenance practices not only preserve the quality of the patches but also promote sustainability by reducing the need for frequent replacements.

Applications in Various Industries

Given its durability and versatility, PVC rubber finds widespread use across multiple industries, each benefiting from its unique properties. In the fashion industry, PVC rubber is critical in defining fashion trends with its application in accessories like belts, bags, and shoes. It allows for vibrant, lasting colors and intricate designs, aligning with dynamic branding strategies.

Moreover, in marketing, PVC patches serve as a robust tool for branding strategies. Companies leverage these durable patches on promotional items, enhancing brand visibility and durability. Similarly, the automotive industry utilizes PVC for its resistance to weather and chemicals, applying it in car mats and upholstery.

The military also benefits from PVC’s rugged nature, using it in badges and gear identifiers which are exposed to harsh conditions. Finally, the sports sector incorporates PVC in merchandise, providing fans with enduring memorabilia.

Industry Emotional Impact
Fashion Inspires creativity and trend-setting
Marketing Builds strong brand identity
Automotive Guarantees safety and longevity
Military Symbolizes resilience and strength
Sports Fuels fan passion and loyalty

These applications highlight PVC’s role in not only meeting practical needs but also in evoking strong emotional connections, further cementing its utility in diverse sectors.